Get started with Pixie3DWritten by Søren Klit Lambæk, Last edited: 18/11/2018
The basics of Pixie3DAt its heart, Pixie3D is a 3D modeling and animation software. Like many other 3D software, Pixie3D adopts a common user interface and layout of four viewports and intuitive menus. Pixie3D provides powerful features for modeling, texturing, animating and rendering 3D scene. The goal of Pixie3D is to make an affordable, solid and easy to use all-round 3D software package. Pixie3D is a perfect choice for independent developers and artists who wants fast results. Downloading and installing Pixie3DIf you have not already downloaded Pixie3D you can download it for free by visiting www.Pixie3D.com At current date only Windows platform is supported. However, there are plans for supporting Linux and Mac as well. At the moment a beta version of Pixie3D can be downloaded for free, you can use this version for evaluation until a full version will be avialable. The beta version does not have any time restrictions applied to it. However it does have some feature limitations and performance restrictions. Once you have downloaded and unzipped Pixie3D you can run it without any system installation. It will literally start up and run just by executing the exe file. This allows you to copy it on a USB stick and always bring it with you. However, some users have experienced issues running Pixie3D on their system due to 3rd party security software such as anti-virus programs that will attempt to block the exe file or some of the dll files from running. At the moment Pixie3D does not have any digital siginture nor a Microsoft Codesign Certificate, so some installed security systems might consider Pixie3D as a potential threat to your system. If you experience a similar issue, you might be able to solve it by manually asking your security system to accept Pixie3D as a trusted software. Please do not hesitate to contact me for assistance here: Contact Starting Pixie3DWhile starting the software you will have to accept a 'Term & Condition' to continue. Shortly after you have accepted, there will pop up a new window. If you have a product key please enter it and click the 'Go' button. Pixie3D will remember your product key next time you run Pixie3D. If you do not have a product key just simply click the 'Try' button to evaluate Pixie3D. You can evaluate Pixie3D with no time limits, however there will be some feature limitations but the restrictions do not prevent you from being able to build 3D models (including materials and textures) and export them to a game engine like Unity3D and Unreal. If at any point a message box is popping up on your screen saying something in the lines of, your hardware does not support high-level shaders, this simply means your graphics card is an older generation hardware and cannot display fancy shadings and shadows in the viewports. Do not worry too much as you can still run Pixie3D without this shader support. Before running the software you might have to give permission to run Pixie3D on your system. If a system message pops up saying that it cannot recognise the application when you are trying to run Pixie3D, simply just click 'Run anyway'. If you are not connected to the Internet while Pixie3D is starting up, there might be an error message box popping up. You can ignore this message as it is not necessary to be online to use Pixie3D. Keep in mind that if you cannot run Pixie3D, please check if an installed fire wall is preventing the software to run. You might have to give permission for Pixie3D to run manually, to do this please refer to the user manual that comes with your fire wall. InterfaceA graphical user interface will appear when the software has been loaded up. You will notice a horizontal menu at the top of the user interface. This menu is the main menu. 
You will probably recognize some of the icons from other Windows applications. If you hover the mouse cursor over the buttons a hint text will appear. The following list describes the features in the main menu starting from left.
I suggest you familiarize yourself with the main menu before moving on to the next section of the user interface. 
On the left side of the main window you should see a vertical menu. This menu is the creation menu. It allows you to access various geometric objects. These type of objects are called primitives because they are by nature simple geometric shapes. You will often use them as a base for more advanced polygon modeling. If you would like to create a primitive in your scene, just simply activate a button and use your mouse pointer to define the dimensions of the primitive in a selected viewport. However, before you create any primitives allow me to explain how the viewports work. 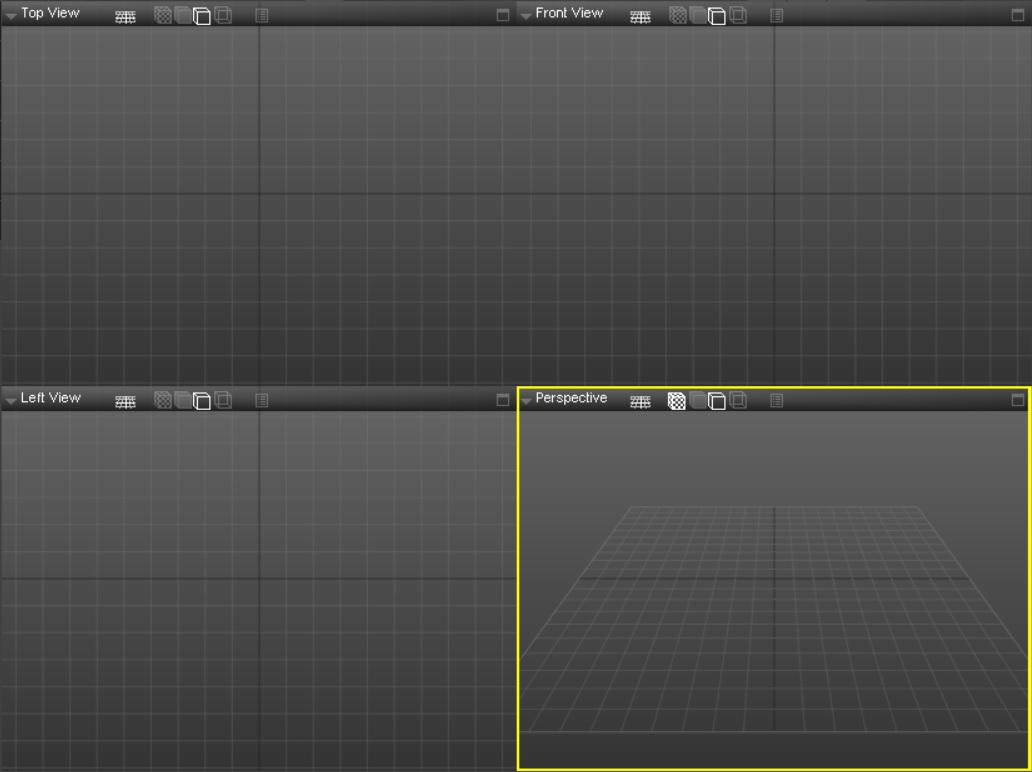
ViewportTo the right of the create menu you will see four viewports. They occupy most to the main window. To understand how the viewports work and their purpose I want you to imagine an empty 3 dimensionel space. This empty space is your scene. When you start Pixie3D your scene is always empty. To make it easier for you to control your scene four cameras have been set up for you so you can see your scene from different angles. The cameras have been labeled to make it easier for you to refer to them. 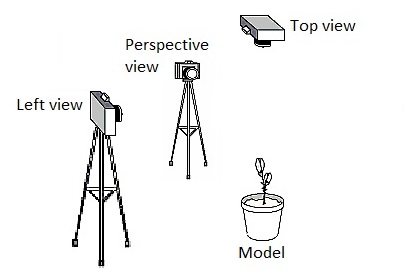
One of the cameras have been labeled 'Top View' because this camera is looking at your scene from top down. The upper left viewport represents this camera. At the moment the viewports are empty because no objects have been created yet. Another camera has been labeled 'Front View' and the viewport for this camera should be next to the 'Top View' viewport. A camera has been labeled 'Left View' and the last camera has been labeled 'Perspective'. By default the 'Perspective' viewport is highlighted by a yellow border, this indicates that the viewport is selected. If you left click on one of the other viewports the highlight should change. A selected viewport can be rotated, panned and zoomed (in/out). It is important you become familiar with this concept because you will often need to navigate a viewport. The 'Perspective' viewport is the only viewport to display the depth of the objects, hence the name. The other viewports display objects in a parallel projection, this makes it easier to place objects and vertices in relation to each other. You have probably noticed that the viewports have their own menu. 
The label of the viewport is actually a drop-down menu. If you click on it you should see a list of options. We will skip the first option because it is only useful if you have created a camera object (This is not possible in the evaluation). The options colored gray, are names of all the view angles available in Pixie3D. If you select one of these the selected viewport will change view. The remaining options are colored blue because they have a special functionality which we will not go into now. 
Next to the name of the viewport is an icon of something resembling a grid. If you click on this icon, you should see that the grid in the viewport disappeared and if you click the icon again, the grid should reappear. You can consider the grid as a ruler to help you measure distances. 
The next four icons are display modes but they are not relevant when no geometric objects are visible, so just skip them for now. 
If you click once on the next icon (the icon that looks like a list) some information should appear in viewport. This information can be used to assess the strength of your graphics card, as well as the amount of objects and triangles displayed. 
If you click once on the last icon the viewport should resize itself. When it is maximized it will overlap the other viewports. You will probably prefer to maximize your viewport most of the time. Click on the icon again and the viewport should reduce to its original size. Create your first scene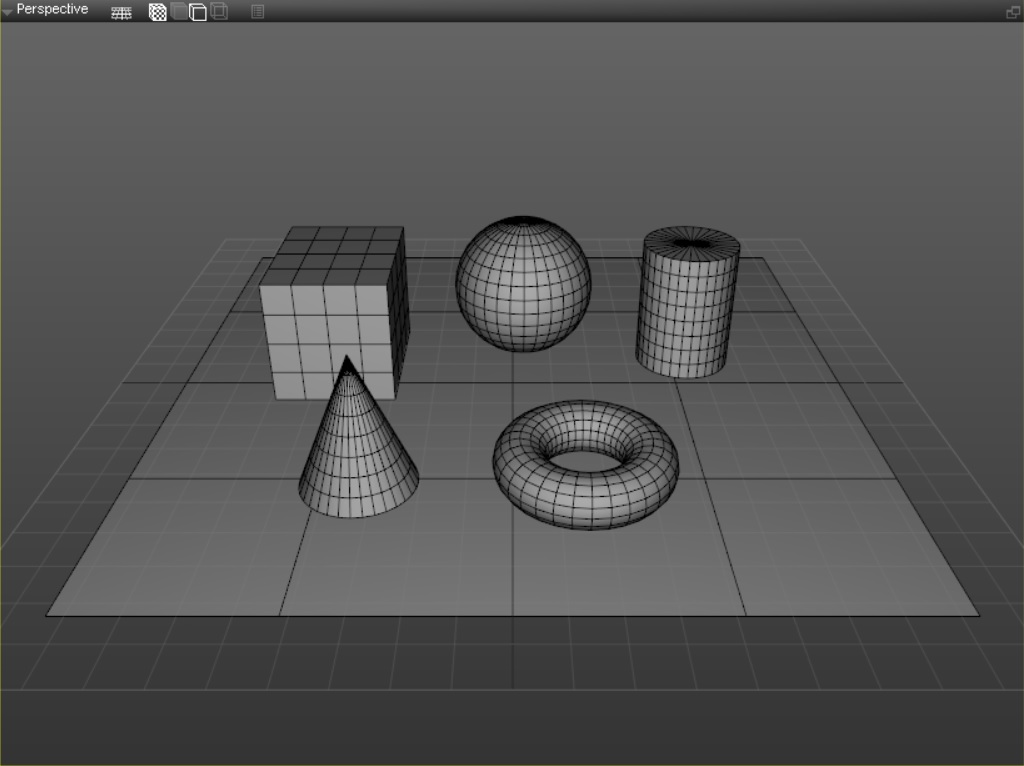
Now that you know a little more about the viewports, the main menu and create menus, you should be ready to create 3D objects in Pixie3D. Why not start out with creating a flat plane and use it as a large floor. Make sure your 'Perspective' viewport is selected. Activate the plane button from the create menu. If you hover over this button, a hint text should appear saying 'Create Plane'.  Now, use the mouse to define the plane in the 'Perspective' viewport by pointing two opposite corners of the plane.
The right side of the user interface should have changed when you started to the plane. This menu shows the properties of a selected 3D object. In the top right corner is the name of the selected 3D object. If you hover over it a hint text should appear saying 'Scene Nodes'. This is actually a drop-down list that contains all objects that in your scene. At this point the list should contain just the one plane you have created. It is a good practice to name your objects with appropriate names so you can easily identify them by name. You will soon find out how easy it is to create 3D objects in Pixie3D, so you could end up having a lot of objects in a very short time and if you do not name your objects, they will carry generic names such as Plane01, Plane02, Plane03 and so on. It is difficult to remember this kind of naming convention so for your own sake let it be a habit, that you name them with appropriate names. In this case, we could name our plane 'Floor'. Click once on the name of the plane itself. When the text is highlighted, type 'Floor' and press Enter or Return on your keyboard. In Pixie3D always finish a change of a value or in our case a renaming by pressing Enter or Return on your keyboard. If you forget to do this your changes will be ignored. Just below the name of the selected object you should see two tabs. The first tab is labeled with the type of the selected object. The second tab is labeled 'Prop'. This is an abbreviation of the word Properties. If you click on this tab, you will see some general properties of the object as well as information about the dimensions of the object and some additional geometric information. Click once on the first tab to go back to the previous menu. Just below the tabs is a section called 'Modifiers'. 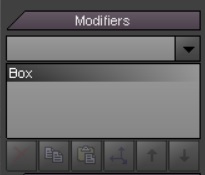
Since this section requires a lot of explanation to fully understand, just skip it for now. I will come back to this section in a bit. The next section allows us to change the parameters for our plane. If you change the values in 'Segment X' and 'Segment Y' you should see that the segments for the plane change in the viewport. This requires a little explanation. All geometric 3D objects in Pixie3D is made up of something called 'Polygons'. Basically, a polygon is a group of triangles. If you activate the 'Prop' tab you should be able to read the exact amount of triangles the plane is made up of. By default, a plane has 4 x 4 segments which is 16 polygons. A polygon for a plane consists of two triangles which will be the 32 triangles. If you do not see any segments in your viewport, it may be your viewports display mode is not set to show them.  The four box-like icons in the viewport menu are your diplay modes. To display segments in the selected viewport, one of the last two icons must be highlighted. If you change the segments for your plane to 1 x 1, your plane should only consist of one polygon. In case you are thinking, why this is important to know?, it will soon become clear to you once you have experiences some polygonal modeling. To be able to set the correct amount of segments for your base model can sometimes be a bit tricky and will need some planning.  Now, move on to the next shape in the creation menu and let's make a box. First define the base of the box in the same way as when you defined the plane. Additionally, when you let go of the left mouse button you can move the mouse vertically to define the height of the box. Once you are happy with the height, simply left click once to finish the ceation of the box.  It is just as easy to create a sphere as it was to create the other two shapes. Once again will need to define two points. The first point is the center of the sphere and the second point will define the radius of the sphere. Once you have found a place where you want to place the ball, hold down the left mouse button while dragging the mouse to define the size of the sphere. When you are happy with the size simply release the mouse button to finish the creation. 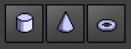 Try to create the other shapes on your own using the same priciples. Viewport navigationOnce you've made some 3D objects, it would be nice to be able to rotate the viewport around them so you can see them from different angles. By default, only your 'Perspective' viewport that can be rotated. If you hold down the right mouse button on the selected viewport and drag the mouse, you will see that the viewport will revolve around the same point. This turning point is your scenes absolute zero point. If you would like to rotate around a selected object, you must change your 'Orbit Mode' from the main menu. 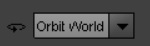 By default it is set to 'Orbit World'. If you select 'Orbit Selected' from the drop-down list and then select an object in your scene you will notice the viewport will revolve around the selected object. You might want to zoom the view to get a better distance from the camera and the selected object. You can zoom your view, simply by using the mouse scroll wheel. On a laptop, slide two fingers vertically on the touchpad or just slide one finger along the left edge of the touchpad to zoom. You also have an option to pan your view horizontally or vertically by holding the middle mouse button down while dragging the mouse. ShortcutsPixie3D supports keyboard shortcuts for nearly every action. The shortcut section can be located under the system tab (right menu panel - make sure no objects are selected). 
Pixie3D allows you to import/exports shortcuts using the file format KSC. If you make the current defined shortcuts to default the shortcuts will be automatically loaded next time you open Pixie3D. You can at any time safely reset the shortcuts to get the shortcuts that came with Pixie3D when you first installed it. 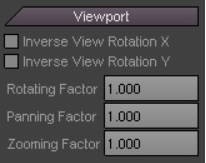
Right below the shortcuts settings you will find a section called Viewport. This section contains mouse settings that will affect the viewport naviagtion. It is possible to adjust mouse sensitivity and invert mouse input as well. The factor values allow you to define separate mouse sensitivity for rotating, panning ans zooming selected viewport. Select, move, rotate, scaleIt is now time to take a look at how we can place our objects in our scene. To move, rotate or resize an object is called to transform an object. You will do this frequently so it is important to understand the concept of this. Fortunately, once you've tried it a few times it will become easy to you. You have probably already guessed that the four buttons in the main menu: Select, Move, Rotate & Scale enable you to use these features. 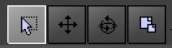 By default, the 'Select' button is enabled and you have actually already used it when you selected objects in your scene. Up until now, you have selected one object at a time but the select feature also allows you to select multiple objects. You can transform multiple objects at once which makes it easier to handle larger scenes. Now, select an object as you would do normally. If you hold down one of the control buttons on your keyboard (CTRL) and then left click on another object in your scene, you should see that both objects are selected. If you click once on one of the selected objects while still holding down the control button on your keyboard, you will see that this object is being deselected. Moreover, the selection feature in Pixie3D also allows you to select multiple objects at once rather than selecting objects individually. If you hold down the left mouse button while dragging across the selected viewport you will see a rectangular dotted frame following the mouse cursor. If you release the mouse button, all objects that are overlapped by the dotted frame will be selected. Let's try to move an object in your scene to a new location.
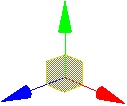 These arrows represent one direction each. The red arrow represents the x axis, the green represents the y axis (vertical) and the blue arrow represents the z axis. These three arrows are collectively called a 'Transformation Gizmo'. If you move the mouse cursor over one of the arrows and hold the left mouse button you will see the arrow changing color. This indicates that this arrow is active. If you keep holding down the mouse button while dragging the mouse, the object should move in the direction of the arrow. Once you release the mouse button, the arrow will get its original color. You can try to move it in another direction by selecting a different arrow. You've probably noticed a transparent yellow box-like thing where the three arrows connect. This is actually just three yellow surfaces which each represent two axes. For example, the yellow area which borders on the red and the blue arrow will represent both of these axes. If you move the mouse cursor on top of a plate and hold the left mouse button and drag the mouse around, you will see that the object can be moved in the x and z axis. This is a neat feature that makes it easier to move an object to a specific position quickly. 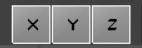 However, sometimes it can be useful not to have the transparent yellow faces shown because of the angle of the view. You can temporarily hide the arrows individually by disabling the X, Y and Z buttons on the main menu.  You've probably also noticed three values along the bottom of the main window change when you moved the selected object. These three values combined constitute the 3D positional coordinate for the selected object. You can manually change these values just by typing new values. This becomes handy when accuracy is important. To rotate an object you will basically use the same technique. When you activate the 'Rotate' button in the main menu, a slightly different transformation gizmo will be displayed. 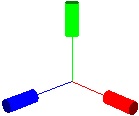 The three arrowheads will be replaced with three cylinders. The colors remain the same and the rotation works the same as when you moved the object. You can also manually enter values but instead of positional coordinates, it will take rotational angle degrees. Once you have rotated the selected object you will notice that the transformation gizmo rotates with the selected object. This is because Pixie3D by default uses local transformations. In most cases, it is perfectly fine but you can get into a situation where it would be better to use a global transformation. The the drop-down list 'Transformation Mode' from the main menu contains two modes: Local and Global. You will notice that the gizmo transformation change orientation when switching between local and global. Most of the time you will probably prefer to use local transformation when moving a selected object. The hotkey to switch between local and global transformation is the key 'T'. 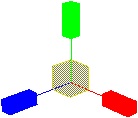 Scaling an object works pretty much the same way. Once again the transformation gizmo looks slightly different when the 'Scale' button in the main menu is activated. Additionally, there is an optional checbox labeled 'Uniform' at the bottom of the main window which will uniform the scaling once checked. This is a handy feature when you want the scale factor to apply the same for all three axes. Clone objectsThe clone button can be located in the main menu. As the name implies, this feature will clone (or duplicate) a selected object. If you select an object and activate the clone button, it will not visually appear as if something has happened, but if you open the 'Scene Nodes' drop-down list, you will see that the selected object has in fact been duplicated but because the copy is positioned at exactly the same place as the original it can be hard to spot visually. However, there is a different, and a more intuitive way to clone an object. If you hold down the Shift key on your keyboard while you move, rotate or scale an object, the selected object will be cloned as well. This time is it more obvious because the clone will by nature not have same transformation as the original object. Delete objectsThe delete button can be located in the main menu as well. As mentioned earlier, you should be careful using this feature when evaluating Pixie3D because the undo and redo features are not supported. Deleting an object works exactly as you would expect. You select an object, you activate the delete button and before the deletion of the selected object takes place you will need to confirm it. The shortcut for deleting an object is the delete key on your keyboard. ModifiersPreviously we brushed a briefly on the modifier section. If you have forgotten where to locate this section just simply selecting one of your primitives and just below the tabs you will find the section "Modifiers'.
If you are not familiar with the use of modifiers it might not be obvious at first what they can be used for and why they can be incredibly time-saving to use. It does require some knowledge to use them correctly. Here are some classic examples where modifers obviously has a huge advantage over traditional polygon modeling. Imagine that you are making a twisted bracelet. You could of course model this bracelet by using traditional polygon modeling. However, this would take some time because it can be difficult to model as you would need to rotate sections of polygons manually repeatedly. On top of that, it also requires some planning in terms of how many polygons are needed in order to reach around a wrist. If you used modifiers to do this, you would actually only have to use just two modifers. You could possibly add them to a box and just by changing some parameters, you would be able to achieve a result that would take hours to achieve by manually edit polygons. Some modifers are so essential that they are almost impossible to avoid. Some modifiers can single handedly improve the quality of your 3D model while others need to be combined to achieve the right effect. Modifiers will not only often save you a lot of time to use but they also allow you to tweak them at any time. Modifiers can work individually as well as combined, simply by placing them on top of each other. You can remove a modifier at any time or re-order a list of them to achieve a different effect without damaging the original geometric surface. This makes them incredibly flexible, interesting and extremely useful to work with. Here is a list of modifiers that comes with Pixie3D by default: 
Texture Mapping This modifier can be used to project a texture on a geometric surface. You can choose to only affect the selected polygons, in case you want to project a texture on a particular area rather than affecting the entire object. 
UV Texture Edit This modifier makes it possible to edit the texture coordinates manually by using a UV texture editor. This is an incredibly important tool. To be able to place texture coordinates manually will often produce a higher visual quality to your 3D object. 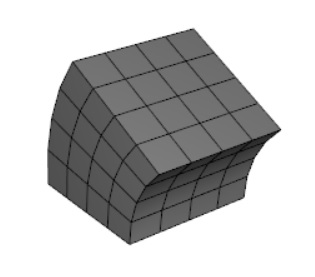
Bend This modifier bends polygons around an axis. You have the ability to bend selected polygons only, so that only a portion of your 3D object will be bent. 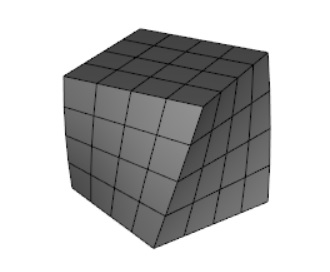
Twist This modifier will twist polygons around an axis. This is a widely used technique that is often used. You also have the ability to twist selected polygons rather than twisting the whole 3D object. 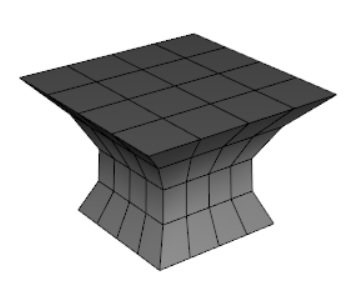
Taper This modifier will taper polygons along an axis. The shape will gradually reduce in diameter. It can single handedly add an interesting effect as well as combining it with other mofifiers. 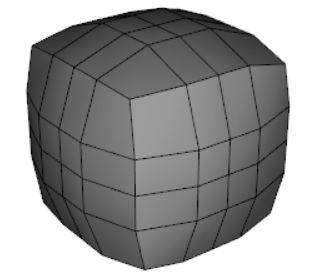
Bulge This modifier can bulge a 3d object so that it will look bloated, almost like a balloon, and it can also give you the opposite effect. 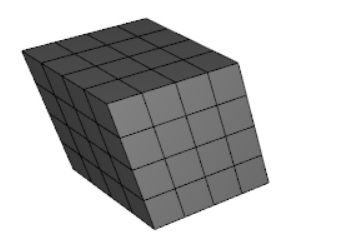
Skew This modifier adds a skewed (or warped) effect to a 3D object. This modifier is not used in the same extent as the others but it can sometimes be indispensable. 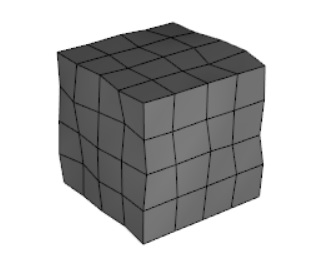
Noise This modifier adds offsets to the polygons. There are many effects you can achieve by using this modifier. It can add dents to a surface, for example you can make a sphere to resemble an asteroid or rocks. You can transform a flat surface into a terrain. This modifier opens up many possibilities for the creative mind. 
Subdivision This modifier multiplies the number of polygons, resulting in sharp corners are rounded and smoothed out. This modifier is often used for high-resolution 3D models used in animated films, but the hardware today is incredibly fast, so many game engines can also use high-resolution 3D models in games. This article will be too long if I wrote detailed examples for all of them. Therefore, I would rather go through an example that can help you get you started. Create a twisted bracelet with modifiers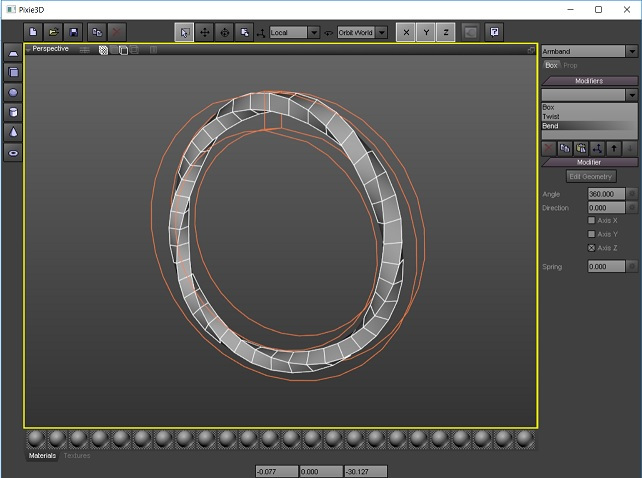
First thing first, I would recommend you to make a new scene by clicking on 'Create New File' button in the main menu or manually delete all your objects.
If you want to add more segments, just select 'Box' in the modifer list and maybe double the value of Segment X, then select the last modifier 'Bend' in order to see the new result. If you want to bracelet more twisted, simply choose the twist modifier in the modifier list and change the value of the angle to 720 degrees, then select the last modifier 'Bend' again to see the result. I encourage you to explore and experiment with combining the different modifiers. I would also like to advise you to watch the videos on http://www.Pixie3D.com Polygon modelingAs powerful as the modifiers are you cannot make everything just by using modifiers. Now that you know the most basic functions of Pixie3D and you should now be equipped to embark on traditional polygon modeling. Depending on what you want to model, you will need to make a primitive and use it as a base but before that, please allow me to explain what you will need to model for your first exercise. Your first modeling assignment is to create a house. To make things a bit easier we will make a simple cartoon styled house, so nothing too complicated. In order to do so, it would make a lot of sense to start out with creating a box. Please navigate to the vertical create tool bar and activate the button that looks like this: First define the base of the house by pressing down the left mouse button and keep holding it down while you move the mouse. When you are happy with the size of your base then let go of the left mouse button and move the mouse vertically to define the height of the box. Once you are happy with the height, simply left click once to finish the ceation of the box. In order to make the task easier for yourself it would be wise to define a reasonable amount of segments for your box before we will start to manually model the shape of the house. to be continued... |


